Introduction
This tutorial is created for those users, which run SociometryPro first time, and who doesn’t want spend a lot of time for reading User Guide and other program’s documents.
The main purpose for using SociometryPro is building sociometry investigation including necessary data, and evaluation of its results with visualization forms and predefined reports. Let’s consider the main program principles in brief using typical steps and a simple example. In the tutorial, we will go through:
- Preliminary phase, the main purpose of the preliminary phase is preparation for the sociometry research
- Sociometry testing, it’s the procedure where the clients make their choices based on the predefined question (this is a sociometry research itself)
- Sociometry analysis, which presents the last phase where then main purpose is calculation and presentation of the sociometry testing results
Preliminary Phase
In advance of sociometry testing, the additional data must be created in SociometryPro program (in other word, you have to provide a phase of preparation for sociometry testing) such as:
- Projectwhere all your data for all sociometry researches are encapsulated
- Client Groupparticipating in sociometry testing
- Sociometry Criterion(or sociometry question which is given to each client in the client group)
- Sociometry Investigationwhich encapsulates the data of a related sociometry testing
Running SociometryPro and creating a project
The program can create projects and save user data in different workspaces. In this way, for example, you can create a single project for College N20, another one for IBM Company, and so on… To create a new project:
- Start SociometryPro from program group “SociometryPro from LeDiS Group” (pass through “Start” button of Windows)
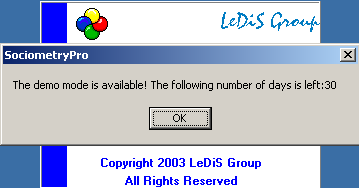
- If the program is in demo mode, then press OK for next message window:
- In the displayed window “SociometryPro”, create new project with toolbar button “Create project”.
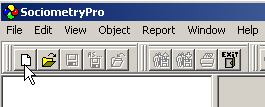
- Save the project with toolbar button “Save project as…”. Input any project filename (for example “testProject_eng”) when you will be asked for that.
Creating a client group
Some client group must be always defined in sociometry investigation. Hence, you have to create a client group data in the program. After that, you have to add clients’ data into this group. During the sociometry testing, the clients of this group will make their choices in accordance to predefined criterion (sociometry question).
To create a client group, perform next:
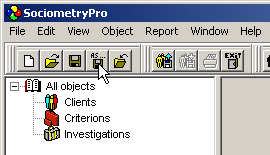
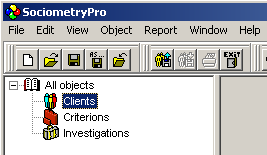
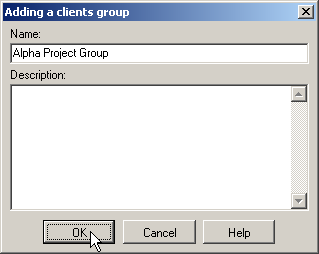
- Select Clients node in the tree view and press INSERT key on the keyboard.
- In the window "Adding a clients group", input group name "Alpha Project Group" and press OK.
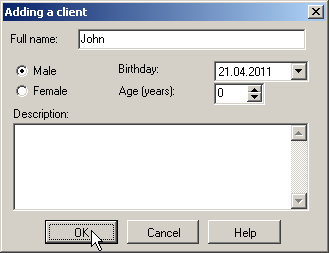
- To add client data into this group, select “Alpha Project Group” node in the tree view and press INSERT keyboard key.

- In the window "Adding a client", input client name "John" and press OK. If you need, point sex radio button (male or female), input birthday and age.
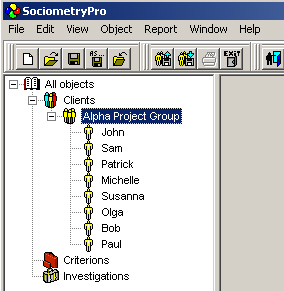
- In the same way (see the previous step), create other 7 clients with names:
- Sam
- Patrick
- Michelle
- Susanna
- Olga
- Bob
- Paul
- Save the project with main menu item “File -> Save”.
PS:
You must always remember that to create a sociometry investigation you have in advance to create a client group with two clients at least (the higher number of clients the better).
Defining a criterion
Any SociometryPro criterion is included into a criteria group. Criteria groups help to place criteria in accordance to user defined preferences. For example, you can create “Formal Criteria” or “Informal Criteria” group, “Criteria for Alpha Project” group and so on.
To create a criteria group, perform next:
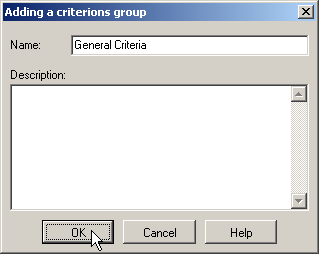
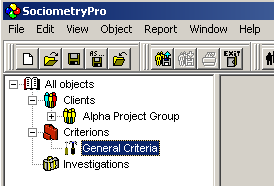
- To create a criteria group, select “Criterions” node in the tree view and press INSERT key on the keyboard.

- In the window “Adding a criterions group”, input criteria group name "General Criteria" and press OK.
- To add a criterion into this group, select “General Criteria” node in the tree view and press INSERT on the keyboard.
- In the window "Adding a criterion" add criterion name "Who is more preferable for you to work in Alpha Project?" and press OK.

- Save project data with main menu item “File -> Save”.
Creating a sociometry investigation
A sociometry investigation unites sociometry testing data and defines its additional parameters. In other word, an investigation clearly connects a client group and a criterion to each other.
You can allow or ban for clients make rejecting (or negative) choices answering the sociometry question. But it must be mentioned that positive choices are allowed always.
As well, in each sociometry investigation, you can set maximum number of choices (of any kind – positive or negative ones). This is an upper limit of choices which any client can make in relation to other clients in the client group.
To create a sociometry investigation, perform next:
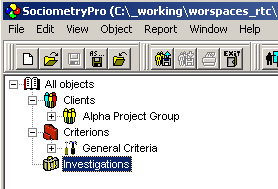
- Select “Investigations” node in the tree view and press keyboard key INSERT.
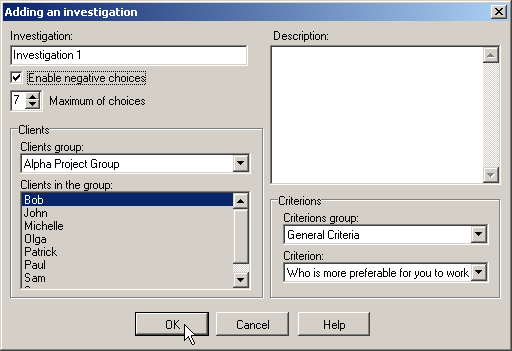
- In the window "Adding an investigation", don’t change investigation name (let it be default), set “Enable negative choices” in active status, input 4 in “Maximum of choices field”. Press OK to confirm creation of the investigation object.
- Save project data with main menu item “File -> Save”.
Providing Sociometry Testing
Sociometry testing is provided in usual manner – with a real people and printed blanks. The blanks can be printed directly from SociometryPro.
To create sociometry blanks, perform next:
- Select “Investigation 1” sociometry testing node in SociometryPro.

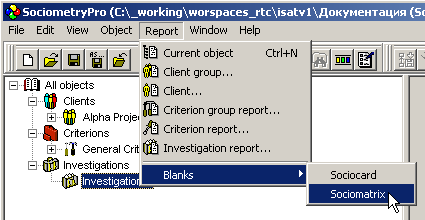
- Create sociocard blank with main menu “Report -> Blanks -> Sociocard”. In this way, input blank’s file name which this document will be saved in.

- Create sociomatrix blank with main menu “Report -> Blanks -> Sociomatrix”. In this way, input blank’s file name which this document will be saved in.
PS:
During sociometry testing, give sociocard blank to each client and ask him to fill this document answering the sociometry criterion.
Printed sociomatrix blank will help to the mentor (or to the consultant who manages sociometry testing) to provide initial saving the results if there isn’t a computer with SociometryPro at hand. Afterwards, all sociomatrix data can be input into SociometryPro for getting the calculated results.
Sociometry Research Analysis
Sociometry testing results are entered into SociometryPro choices table by a mentor as it’s described below. In resulting of that, you can open different visualization forms and build reports.
Entering choices into SociometryPro
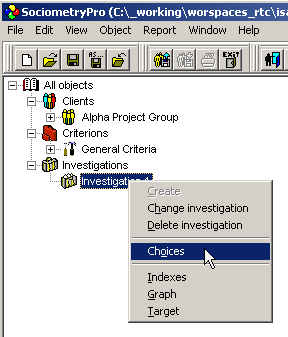
- To open windows “Choices”, select “Investigation 1” node and use context menu “Choices”:
- In opened choices table window, use mouse to input choices in the cells (use context menus "Positive", "Negative", "Clear" or press mouse left button over the table cells).
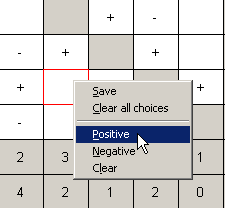
- Use context menu “Save” to save the entered choices.

PS:
Large arrow in upper left corner of the choices window defines who really makes choices. In this case (see the previous picture), the clients in left column choose those clients who is placed at the top row. And a choice is placed in the crossing a row and a column.
Don’t forget pass step 3 or you will not see the sociometry data in visualization forms and reports.
Visualization of results
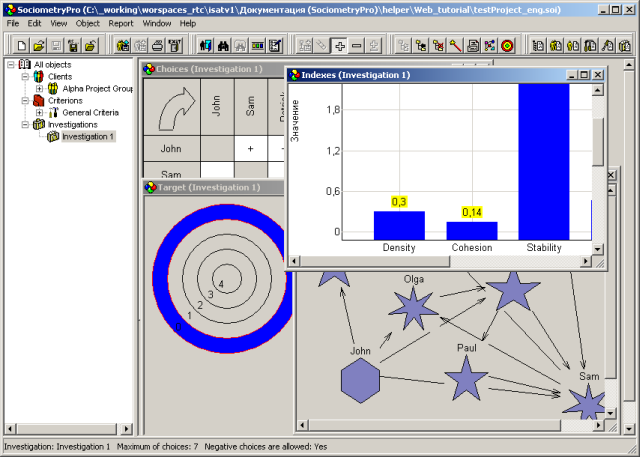
SociometryPro can present the sociometry results using suitable visualization forms. It’s provided with three types of visualization forms:
- Indexes, where you can see the number characteristics of a sociometry testing as charts of group and private sociometry indexes
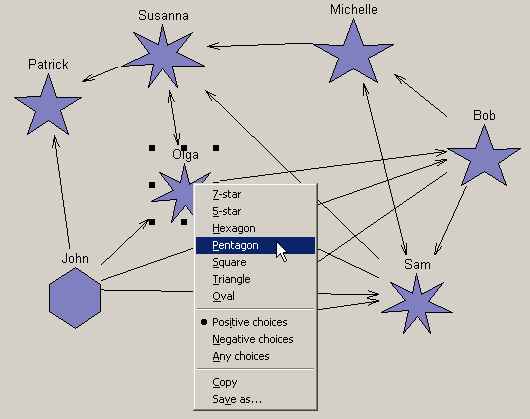
- Graph, where a client group is presented as a suite of different figures on the plane. Here, each figure is related to a client in the client group, and all choices are shown as arrows amongst those figures
- Target, where each ring of the form is related to a client list with equal input choices. Here, the more nearly a ring to the center of the form, the higher number of choices was got by clients of this ring
To build visualization forms, perform next:
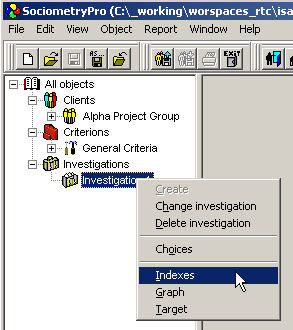
- Select "Investigation 1" node in the tree view. To open forms with indexes press context menu “Indexes”:
- In the same way as at previous step, to open form with graph, select "Investigation 1" node in the tree view and press context menu “Graph”.
- In the same way as at previous step, to open form with target, select "Investigation 1" node in the tree view and press context menu “Target”.
- Carefully look for the sociometry results presented in visualization forms using all your experience and knowledge in sociometry area.
- Save project data with main menu item “File -> Save”.
PS:
Visualization forms help in evaluation of both positive and negative choices. Here, you can use context menu items in visualization forms such as “Positive choices” and “Negative choices”. As well, you can use “Any choices” to show all choices in a visualization form.
As well, you can change figures in the graph form on your own. Such a manual change of figures helps to make graph view more suitable for analysis.
Building reports
Reports can be created in HTML format and printed at a printing device. To build a sociometry report, perform next:
- Use main menu item “Report -> Investigation report…”.

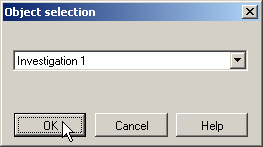
- In the window “Object selection”, press нажмитеOKwith “Investigation 1” selected.
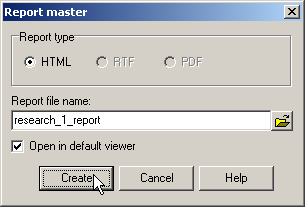
- Input report file name in “Report master” window, check “Open in default viewer” and press Create.
- Print the opened report with a printing device.