



7.Test Player
7.1.General Information
The Test Player makes it possible to run tests in a created or open project.
To launch a test, use one of the following methods:
- Select the test node or any of its child nodes in the Test Builder node tree and activate the main menu command “Object → Run test”.
- Select the test node or any of its child nodes in the Test Builder node tree and use the keyboard shortcut CTRL-R.
- Select the test node in the Test Builder node tree and activate the context menu command “Run test”.
- Select the test node or any of its child nodes in the Test Builder node tree and click the toolbar button

.
Launching a test opens a child window with the title “Test (<Test name>)”. Running a test consists of displaying a sequence of screens to the user containing questions and their available answers. The user moves between screens, subject to the conditions defined for the current test and screen.
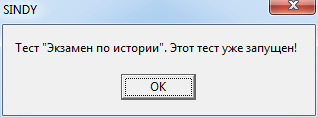
Although any number of running-test windows can be open, the same test cannot be launched more than once. If an attempt is made to launch a test that is already running, the program displays a warning similar to the following:
A test window can be closed by the user at any time. To do this, either left-click the icon 
or use the “Close” command in the context menu of the Test Player child window.
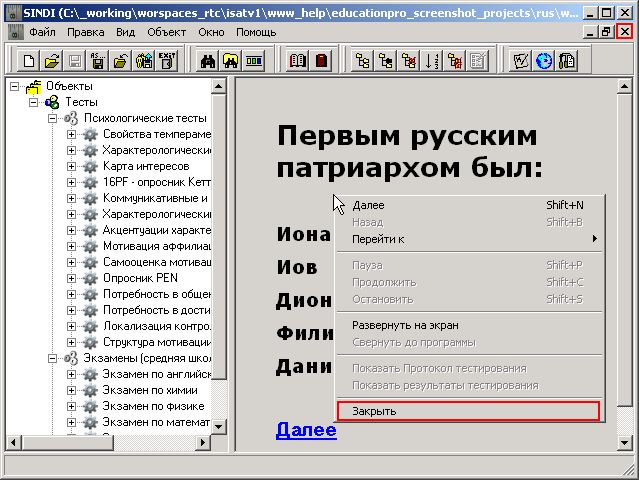
Attempting to close a child window opens a special dialog for final confirmation that the test window should be closed.

Clicking “Yes” closes the test window, while “No” leaves the window in its current state.
When exiting Sindy while tests are running, a similar confirmation dialog is displayed for each running test. Canceling the closing of even one test completely interrupts the program-exit procedure, leaving any tests that have not yet been closed running.
It should be noted that Test Player child windows have additional icons for controlling the state of the child window. To the left of the child-window close icon 
is the icon  , which expands the window to fill the entire Test Player panel. Farther to the left is the icon
  , which minimizes the child window to its smallest size.
When a test is launched, the following types of information screens are displayed in Test Player child windows:
7.2.Arranging Child Windows
When several tests are running in the program at the same time, it becomes quite convenient to manage the child windows using the “Window” group of the main menu. Use the “Window → Cascade” main-menu command to arrange child windows in a cascade.
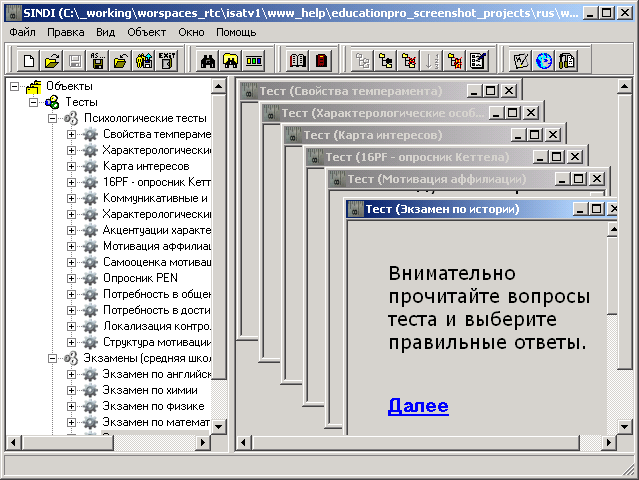
Use the “Window → Tile” main-menu command to arrange child windows so that they fill the entire Test Player panel.

7.3.Changing the Size of a Child Window
The Test Player makes it possible to expand the child window of a running test to the full screen. This program feature makes it possible to eliminate the influence of unrelated software elements on the testing process.

No more than one child window of a running test can be displayed full screen at any one time. To expand another test window to full screen, first restore the window that was previously expanded.
To switch to full-screen test-running mode, use the child window’s context menu command “Expand to Full Screen”. To return to embedded child-window mode, use the child window’s context menu command “Restore to Program”.
7.4.Test Instructions
The first screen displayed when a test is run is the instruction screen prepared when the test was constructed.

The instructions provide the user with all necessary information about exactly what must be done while taking this test. The user should read these instructions carefully. The information in them is used when answering the test questions presented on the following screens.
To go to the first test question, use one of the following methods:
- Left-click the link

located directly below the instruction text - Use the keyboard shortcut SHIFT-N.
- Use the “Next” command in the test window’s context menu.
7.5.Question-and-Answer Screens
Question-and-answer screens are used to perform the testing procedure itself. Each such screen displays one question and the available answer options for that question. During testing, the user selects the most appropriate answers for each question.
7.5.1.Selecting Answers
Answers can be selected using either the mouse or the keyboard.
To select an answer with the mouse, move the pointer to the selected answer and click the left mouse button. To select an answer using the keyboard, you can use the keyboard shortcuts defined for the Test Player.
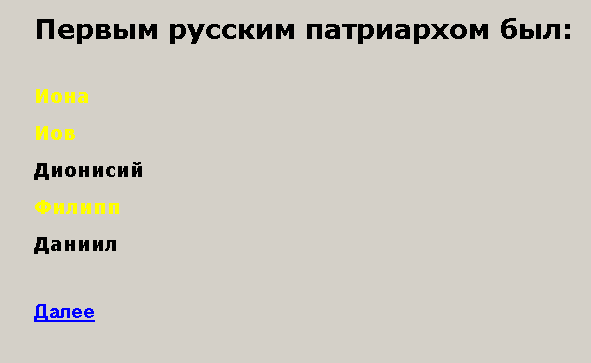
An answer selected by either method (mouse or keyboard) changes color.

To deselect an answer, perform the same action on the already selected answer.
Sindy provides various answer-selection modes depending on the settings defined when the current test and current question were constructed.
If the “Multiple answers” option in the “Multiple answer selection” group is enabled for the current question, newly selected answers are activated in addition to answers that have already been selected.
However, if the “Maximum number of answers” field in the “Multiple answer selection” group for the current question contains a value equal to the number of answers already selected, each subsequent attempt to select an answer causes a message similar to the following to appear:

Thus, the program prevents the user from selecting more answers than specified in the “Maximum number of answers” field.
It should be noted that if the “Multiple answers” option in the “Multiple answer selection” group is disabled for the current question, selecting each new answer automatically deactivates the answer previously selected for the current question.
If the “Required answer” option in the “Multiple answer selection” group is enabled for the current question, and the current test has the “Forward only” or “Forward and backward” option selected in the “Test navigation” group, the user must select at least one answer to the current question before moving to the next test screen. Otherwise, a message similar to the following is displayed:

A similar message is displayed if the “Required answer” option in the “Multiple answer selection” group is enabled, while the test has the “Any question” option selected in the “Test navigation” group and the “Question repeats” option is disabled.
With the same settings but with the “Question repeats” option enabled, no such warning is displayed. In this case, however, if at least one answer was not selected for some test questions, the final test screen contains a list of links to those skipped questions with a suggestion to return to them and provide answers.
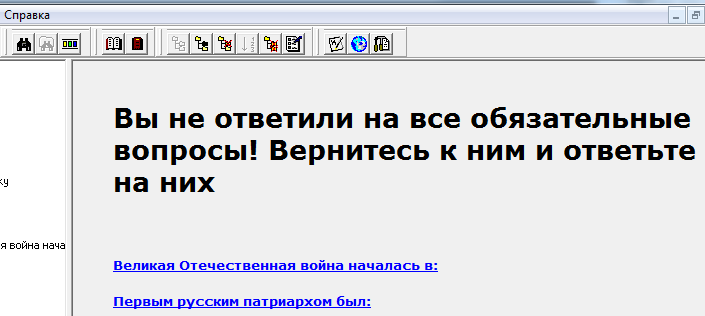
In this case, test reports are not available until you answer all test questions.
To answer skipped questions, click the question link and use the “Go To → <question name>” context menu command to locate the remaining skipped questions.
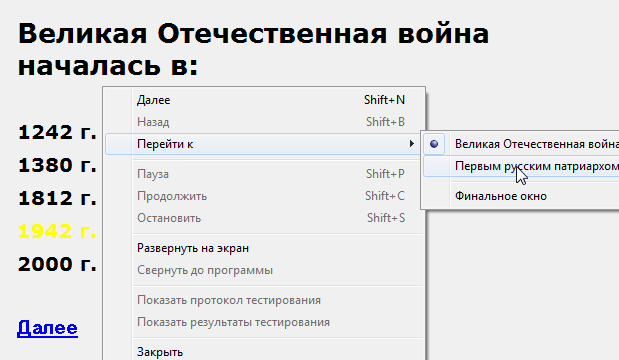
7.5.2.Moving to a New Question
The system controls navigation through test questions according to the “Test navigation” group settings defined when the test itself was constructed.
When the “Forward only” option in the “Test navigation” group is selected, all test questions are displayed sequentially from first to last according to their defined order. In this case, use one of the following methods to move through the test questions:
- Left-click the link
located directly below the instructions - Use the keyboard shortcut SHIFT-N.
- Use the “Next” command in the test child window’s context menu.
After the last question in the test is displayed, the next screen is the final test screen.
When the “Forward and backward” option in the “Test navigation” group is selected, all test questions are displayed sequentially from first to last according to their current order, but navigation is possible in both directions (forward and backward). In this case, use one of the following methods to move through test questions:
- To go to the next test question:
- Left-click the link
located directly below the instructions. - Use the keyboard shortcut SHIFT-N.
- Use the “Next” command in the test child window’s context menu.
- Left-click the link
- To go to the next test question:
- Left-click the link

located directly below the instructions. - Use the keyboard shortcut SHIFT-B.
- Use the “Back” command in the test child window’s context menu.
- Left-click the link
After the last question in the test is displayed, the next screen is the final test screen. In addition, only forward movement is allowed from the screen containing the first question.
When the “Any question” option in the “Test navigation” group is selected, it becomes possible to move freely to any test question. In this case, use one of the following methods to move through test questions:
- To go to the next test question:
- Left-click the link
located directly below the instructions. - Use the keyboard shortcut SHIFT-N.
- Use the “Next” command in the test child window’s context menu.
- Left-click the link
If the “Question repeats” option is also enabled (i.e. repeated questions are allowed), navigation proceeds to the next question immediately following the current one. If the “Question repeats” option is disabled (i.e. repeated questions are prohibited), the next question is the nearest question after the current one that has not yet been displayed during the current testing session.
- To go to the previous test question:
- Left-click the link
located directly below the instructions. - Use the keyboard shortcut SHIFT-B.
- Use the “Back” command in the test child window’s context menu.
- Left-click the link
If the “Question repeats” option is also enabled (i.e. repeated questions are allowed), navigation proceeds to the previous question immediately preceding the current one. If the “Question repeats” option is disabled (i.e. repeated questions are prohibited), the previous question is the nearest question before the current one that has not yet been displayed during the current testing session.
After the last question in the test is displayed, the next screen is the final test screen. In addition, only forward movement is allowed from the screen containing the first question.
- To go directly to any test question, use the context menu command “Go To → <question name>”
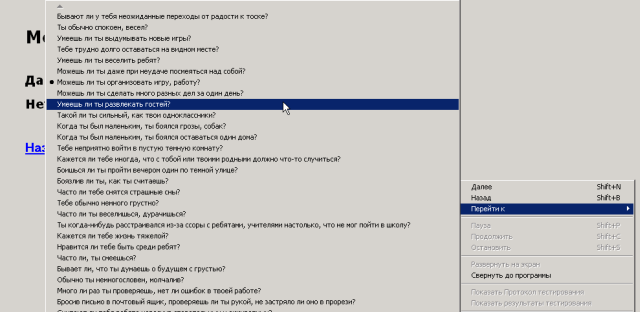
The context-menu item for the current question is additionally marked with a dot on the left.
If the “Question repeats” option is also disabled (i.e. repeated questions are prohibited), the menu items for all questions already displayed during the current testing session are unavailable.
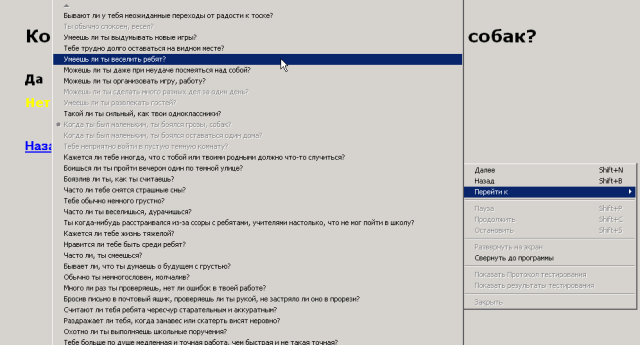
7.6.Final Test Screen
The final test screen performs the following functions:
- If, during testing, the current test contains questions requiring answers that were not answered, the message “You have not answered all required questions! Return to them and answer them” is displayed. A list of links to these questions is shown below the message. In this case, to complete the test successfully you must go to each of these questions (by left-clicking its link) and provide an answer.
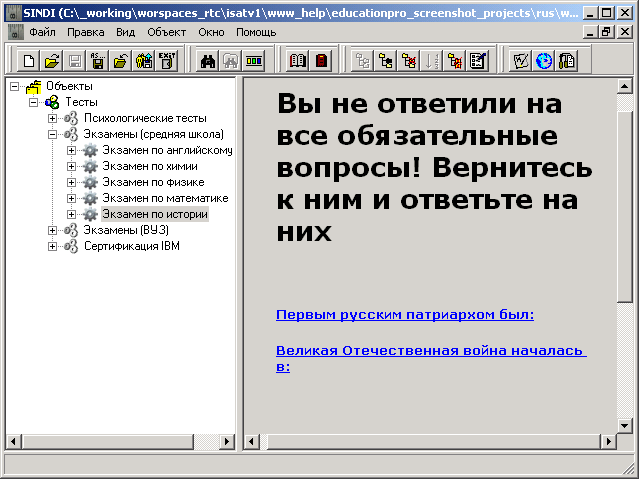
To complete such a test, you must answer all skipped required questions whose links are displayed on the final test screen. To go to a skipped required question from the displayed list, simply left-click one of the links. After navigating to it, select at least one answer.
- If all required answers in the test have been provided, the message “Testing completed! Generate reports and save them if necessary” is displayed. In addition, the context-menu commands for obtaining result reports become available: the “Test Protocol” and the “Test Results Report”.
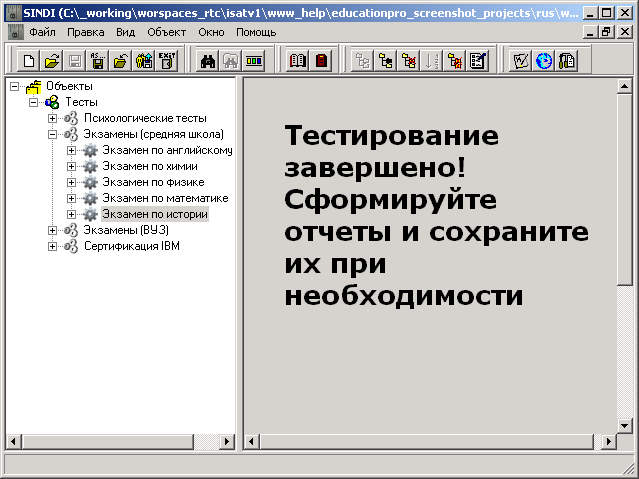
,3
Use these menu commands to save the test results as a text file and use these reports for subsequent analysis.